NOW! GET 25% OFF ON ALL ITEM
Blog
-
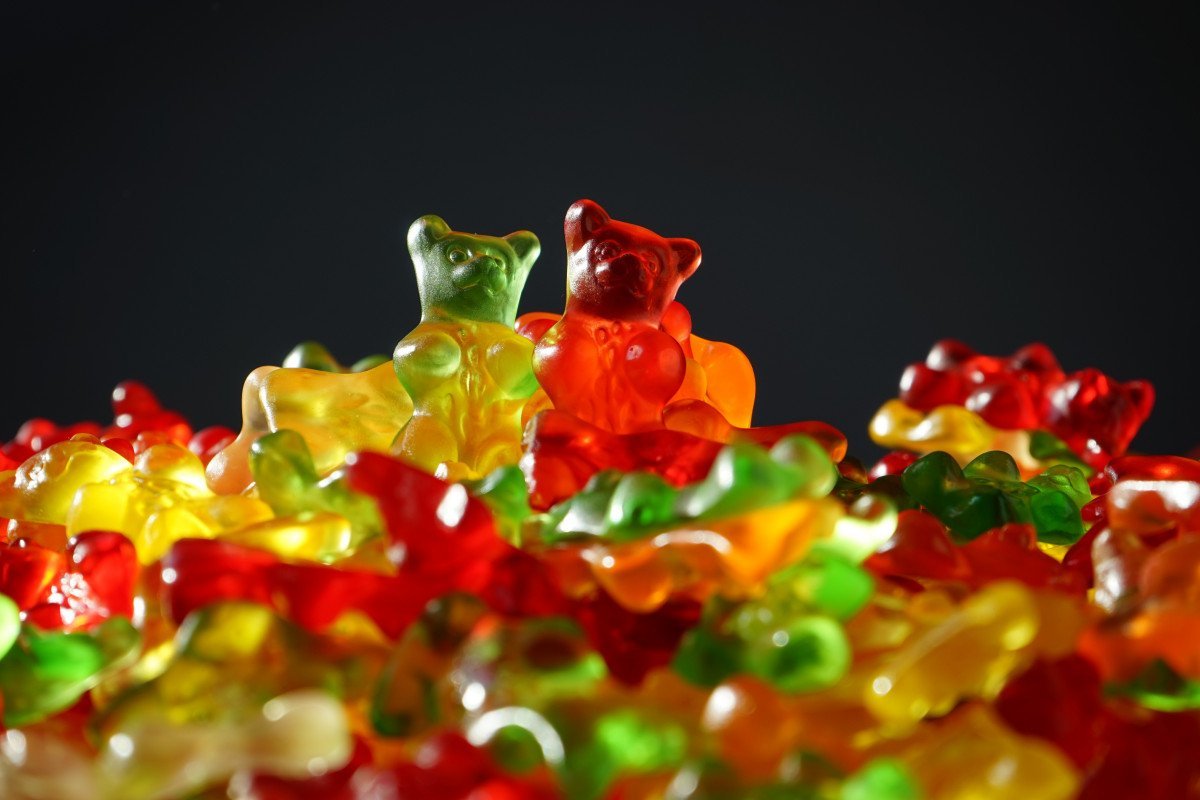
The Science of Gummy Bears: How Gelatin Creates the Perfect Chew
Gummy bears, with their vibrant colors, fruity flavors, and satisfying chew, are one of the most beloved candies worldwide. These chewy treats are a favorite among both children and adults, and their unique texture is what sets them apart from other candies. But what is it that makes gummy bears so chewy? The answer lies in the science behind the key ingredient: gelatin. In this article, we’ll explore how gelatin creates the perfect chew for gummy bears and dive into the fascinating process of their creation.
1. What is Gelatin?
Gelatin is a protein derived from animal collagen, which is found in the connective tissues, skin, and bones of animals. It’s made by boiling animal parts, such as pig or cow skin, in water to extract the collagen. This collagen is then purified and dried into a powder or sheets, which can later be dissolved in liquid to form a gel-like consistency.
Gelatin is unique because it has the ability to absorb large amounts of water and form a gel when it cools. This gel formation is what gives gummy bears their chewy texture and allows them to hold their shape. The process of making gummy bears is largely centered around manipulating the gelatin to create the desired consistency and texture.
2. The Role of Gelatin in Gummy Bears
The texture of a gummy bear is primarily determined by the gelatin concentration in the candy. Gelatin works by forming a network of long protein strands when dissolved in hot liquid. As the mixture cools, these protein strands intertwine, trapping water and other ingredients inside, which results in the firm but elastic texture we recognize in gummy candies.
- Gelatin as a Gelling Agent: When gelatin is mixed with water, it forms a hydrocolloid gel, which gives gummy bears their signature chewy consistency. The amount of gelatin used affects how firm or soft the gummies will be. More gelatin creates a firmer gummy, while less gelatin results in a softer, more elastic chew.
- Chewy Texture: The gelatin’s ability to absorb and retain water helps maintain the moisture balance in gummy bears, contributing to their soft and chewy texture. When you bite into a gummy bear, the gelatin forms a flexible, bouncy network that provides resistance as you chew, which is the defining characteristic of gummies.
3. The Process of Making Gummy Bears
Making gummy bears involves several key steps, with gelatin playing a central role at each stage.
- Heating the Ingredients: The process starts by heating a mixture of sugar, corn syrup, water, and gelatin. The gelatin is dissolved in the water and heated until it fully melts into the liquid, creating a smooth mixture. The sugar and corn syrup provide sweetness and additional texture, while the water helps create the gummy bear’s moisture content.
- Flavor and Color: Once the gelatin mixture is ready, flavorings, fruit juices, and food coloring are added to give the gummies their characteristic taste and appearance. These ingredients contribute to the fruity, sweet flavors that we associate with gummy bears.
- Molding: The liquid mixture is then poured into silicone molds shaped like gummy bears. The molds are filled with the warm, liquid candy mixture, which then begins to cool and set as the gelatin forms a gel.
- Cooling and Setting: The molds are left to cool for several hours, during which time the gelatin solidifies and takes on its chewy texture. The cooling process allows the gelatin to form a strong network, which helps the gummy bears retain their shape and texture.
4. Gelatin’s Role in the Gummy Bear’s Elasticity
Gelatin’s ability to create elasticity is crucial in making gummy bears appealing. Elasticity refers to the gummy bear’s ability to stretch and return to its original shape, which gives the candy its “bounce” when chewed.
The gelling process is what gives gummy bears the flexibility to bend and stretch. When you chew a gummy bear, the gelatin network flexes, allowing the candy to deform, but it quickly returns to its original shape once the pressure is released. This elastic characteristic is a result of the long protein chains in gelatin that create a mesh-like structure, offering both resilience and chewiness.
5. The Role of Other Ingredients
While gelatin is the star ingredient responsible for the chewy texture, other components also contribute to the final product.
- Sugar and Corn Syrup: These ingredients not only provide sweetness but also affect the texture of the gummy bears. Corn syrup helps prevent crystallization of sugar, making the final gummy smooth and not gritty. Sugar also plays a role in maintaining the softness of the gummy bear.
- Acids: Citric acid or tartaric acid is often added to the gummy mixture to provide tartness, balancing the sweetness and enhancing the fruity flavor. The acidity also interacts with the gelatin, influencing the texture and firmness of the gummies.
- Flavorings and Colorants: Natural or artificial flavorings are used to give gummy bears their signature fruity tastes, while food colorings are added to create the vibrant, colorful appearance of the candies.
6. The Texture Profile: How to Achieve the Perfect Chew
The perfect chewiness of a gummy bear is achieved through a precise balance of gelatin and other ingredients. The texture can be adjusted based on the amount of gelatin used in the mixture, the cooling process, and even the addition of certain acids.
- Firmness vs. Softness: By altering the gelatin concentration, manufacturers can create different textures. If the gelatin content is higher, the resulting gummy will be firmer and more resistant to breaking, creating a more substantial chew. Lowering the gelatin concentration results in a softer, more elastic texture.
- Elasticity and Bounciness: A key part of the chewy experience is how the gummy bounces back after being stretched. The longer the gelatin chains, the more elastic the candy will be. This balance between firmness and elasticity is what makes gummy bears enjoyable to eat—they have a perfect balance of resistance and bounce.
7. Vegan Alternatives to Gelatin
In recent years, with the growing demand for plant-based products, vegan gummy bears have gained popularity. Vegan gummy bears are made using agar-agar or pectin as a substitute for gelatin. Agar-agar, a substance derived from seaweed, forms a gel when combined with water, while pectin is a natural gelling agent found in fruits like apples and citrus. These alternatives mimic the texture of traditional gelatin-based gummies but are suitable for those following a vegan diet.
While the texture of vegan gummy bears may differ slightly—being less elastic and more jelly-like—these alternatives still provide a chewy, enjoyable experience.
8. Conclusion
The chewy, bouncy texture of gummy bears is thanks to the unique properties of gelatin, which creates a gel-like structure that forms the basis of the candy’s elasticity and chewiness. From the moment gelatin is dissolved in hot liquid to the final cooling process, it plays an essential role in shaping the texture and overall quality of gummy bears. Along with other ingredients like sugar, corn syrup, and flavorings, gelatin ensures that gummy bears maintain their signature chewy appeal, making them a timeless treat that continues to delight candy lovers around the world.
-
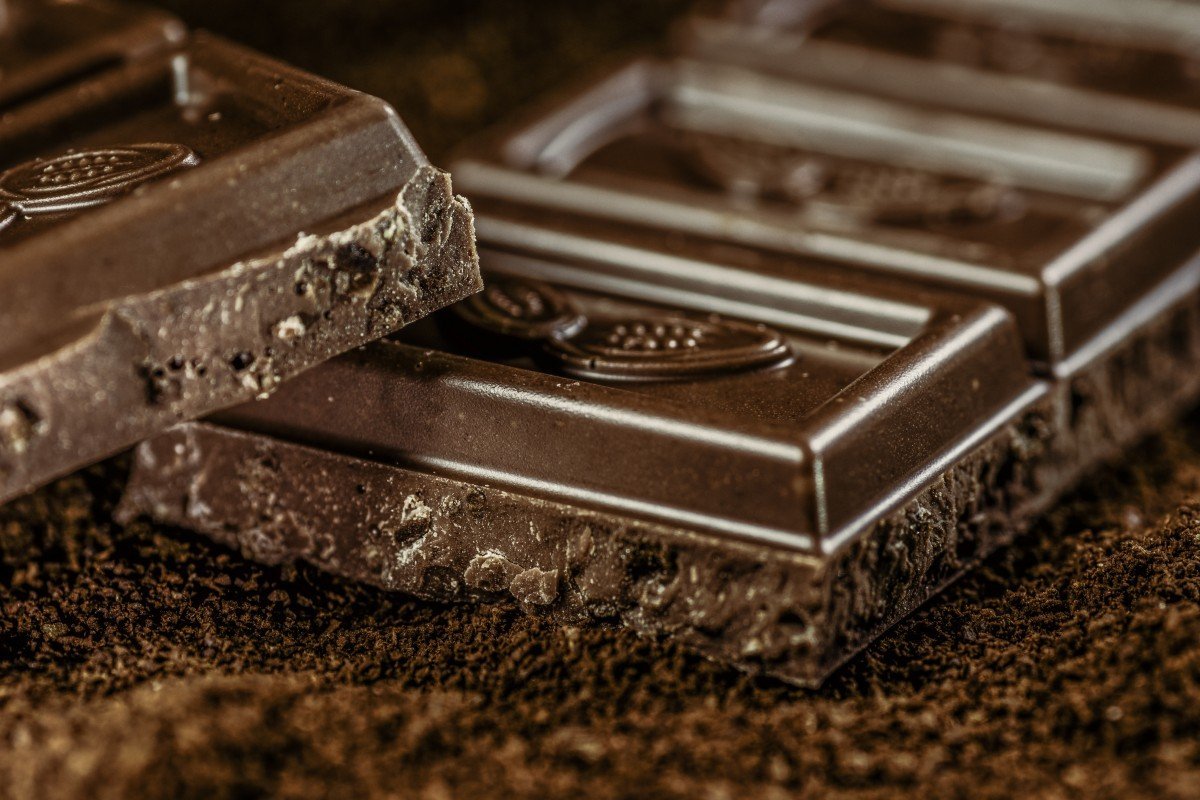
From Cocoa to Candy: How Chocolate Bars Are Made
Chocolate bars are one of the most beloved and indulgent treats enjoyed by people of all ages. Behind the smooth, sweet taste of a chocolate bar lies a fascinating process that transforms the raw cocoa bean into a delicious, melt-in-your-mouth candy. From harvesting cocoa beans to packaging the final product, the journey of making a chocolate bar is a meticulous and artful one. In this article, we’ll explore the step-by-step process of how chocolate bars are made, from cocoa to candy.
1. Harvesting the Cocoa Beans
The journey to making chocolate begins in the cocoa farms of tropical regions, primarily in West Africa, South America, and Southeast Asia, where cocoa trees grow. Cocoa beans are the seeds of the Theobroma cacao tree, and their quality and flavor are influenced by the conditions in which they are grown.
The process starts with the harvest of cocoa pods, which grow on the trunks of the trees. Harvesting cocoa pods is done by hand, typically using machetes or knives to carefully cut the pods from the tree. Each pod contains 30-50 cocoa beans surrounded by a white, sweet-tasting pulp. Once harvested, the pods are cracked open to extract the beans.
2. Fermentation: Developing Flavor
After the beans are removed from the pods, they go through a crucial process called fermentation. The cocoa beans are placed in shallow containers, such as wooden boxes or banana leaves, and left to ferment for about 5-7 days. During fermentation, the beans undergo chemical changes that begin to develop their flavor. The natural sugars inside the beans break down, and the beans lose their bitter taste, gradually becoming more palatable. Fermentation also removes the excess moisture in the beans, which is important for the next stages of processing.
Fermentation is a critical step because it contributes to the unique flavors that each batch of cocoa beans will impart to the finished chocolate. Beans that are fermented improperly may result in chocolate that is flat or sour in taste.
3. Drying and Roasting the Cocoa Beans
Once fermentation is complete, the beans are spread out under the sun to dry. This drying process typically takes about 1-2 weeks and helps reduce the moisture content of the beans to around 7%. The beans are regularly turned to ensure they dry evenly.
After the beans are thoroughly dried, they are roasted to enhance their flavor. Roasting is done at high temperatures, typically between 250-350°F (120-175°C), and it brings out the deep, rich flavors that are characteristic of chocolate. Roasting also loosens the shells of the beans, making it easier to remove them in the next step.
The roasting process plays a significant role in developing the final flavor of the chocolate, and the specific roasting technique used can affect the taste. Dark roasts produce stronger, bolder flavors, while lighter roasts create more subtle, delicate notes.
4. Cracking and Winnowing: Separating the Beans
After roasting, the cocoa beans are cracked open to remove their shells. The outer shell is tough and bitter, while the inner portion, known as the nib, is the edible part of the bean. The nibs are rich in cocoa solids and cocoa butter, the two essential components that make chocolate.
To separate the nibs from the shells, the beans are passed through a process called winnowing, which uses a combination of mechanical cracking and airflow. This process breaks the beans into small pieces, called nibs, while the lighter shell fragments are blown away.
At this point, the nibs are ready to be turned into chocolate, and they contain all the essential flavors and fats needed for chocolate production.
5. Grinding the Cocoa Nibs
The cocoa nibs are then ground into a thick paste called chocolate liquor (despite the name, this does not contain any alcohol). During grinding, the friction generates heat, causing the cocoa nibs to release their cocoa butter, which helps turn the paste into a smooth, thick liquid.
The chocolate liquor consists of cocoa solids (which provide the chocolate’s flavor) and cocoa butter (which gives the chocolate its creamy texture). The ratio of cocoa solids to cocoa butter determines the type of chocolate being produced. For example, dark chocolate has a higher percentage of cocoa solids, while milk chocolate contains more sugar and milk powder.
6. Conching: Refining the Texture
After the chocolate liquor is created, it undergoes a process called conching, where it is continuously mixed and aerated in a machine known as a conche. This step can last anywhere from several hours to a few days, depending on the desired texture and flavor.
Conching helps smooth the chocolate and refine its texture by breaking down any remaining cocoa particles, making the chocolate finer and creamier. It also helps develop the chocolate’s flavor by allowing the cocoa solids and cocoa butter to blend together harmoniously. During this process, additional ingredients such as sugar, milk powder, and vanilla may be added to the chocolate mixture, depending on the type of chocolate being produced.
7. Tempering: Creating the Perfect Shine and Snap
Once the chocolate has been conched, it undergoes a crucial step called tempering. Tempering involves cooling and reheating the chocolate to specific temperatures to ensure the cocoa butter crystals are properly aligned. This process is important because it gives the chocolate its glossy finish and ensures that it sets with a perfect snap when broken.
Proper tempering is essential for achieving the smooth texture, shiny appearance, and firm consistency that people expect from high-quality chocolate. When done correctly, tempered chocolate will harden evenly and resist melting at room temperature.
8. Molding and Cooling
After the chocolate has been tempered, it is poured into molds to create the shape of chocolate bars. The molds are vibrated to remove air bubbles and ensure that the chocolate settles into every crevice. At this stage, additional ingredients like nuts, fruits, or caramel may be added, depending on the type of chocolate bar being made.
Once the chocolate has been poured into molds, it is cooled and allowed to set. This process solidifies the chocolate, giving it its final texture and form. Cooling can take place in a refrigerated environment, ensuring the chocolate sets quickly and evenly.
9. Packaging: Ready for the Market
Once the chocolate has fully set and hardened, the final step is packaging. The chocolate bars are removed from the molds, wrapped, and sealed to protect them from moisture and air, ensuring they stay fresh until they reach the consumer. Packaging often includes branding and labeling, which showcases the ingredients and origin of the chocolate, giving consumers information about the chocolate’s quality and source.
Some high-end chocolate brands also include certifications, such as Fair Trade or organic, which indicate that the cocoa beans were sourced ethically and sustainably.
Conclusion
The process of making chocolate bars is an intricate and careful journey that transforms humble cocoa beans into the smooth, delectable treats we love. From the initial harvest of the cocoa pods to the final packaging of the chocolate bars, each step plays a vital role in shaping the flavor, texture, and quality of the finished product. Whether it’s dark, milk, or white chocolate, the mastery of cocoa fermentation, roasting, grinding, conching, and tempering results in a mouthwatering confection that has delighted generations and will continue to do so for years to come.
-

The Making of Croissants: A Buttery Layered Delight
Croissants are a beloved pastry that has won hearts worldwide with their irresistible combination of buttery layers and delicate, flaky texture. Whether enjoyed for breakfast, as a snack, or as a component of a more elaborate meal, croissants are a symbol of indulgence and craftsmanship. However, behind this simple yet luxurious pastry lies a meticulous process of layering dough and butter to create the signature crispiness and flakiness that make croissants so special. In this article, we’ll explore the step-by-step process of making croissants, from mixing the dough to the final golden, buttery result.
1. The Basics: The Dough
The process of making croissants begins with creating the dough, which is a form of yeast-leavened dough. This dough is similar to a pâte brisée or pâte feuilletée (puff pastry), but it contains yeast, giving it a slightly airy and elastic quality.
The key ingredients in the dough include:
- Flour: High-protein bread flour is typically used for croissant dough, as it creates a strong gluten structure, which helps trap the layers of butter as the dough bakes.
- Yeast: Active dry yeast or instant yeast is added to the dough to enable the fermentation process, which helps the dough rise and become light.
- Milk: Adds moisture and richness to the dough, contributing to the soft texture of the finished croissant.
- Sugar: A small amount of sugar is added, not just for sweetness but to help activate the yeast and contribute to the browning of the croissants as they bake.
- Salt: Enhances the flavor and balances the sweetness of the dough.
To begin, the yeast is activated by mixing it with warm milk and sugar, which helps it dissolve and start fermenting. Once the yeast is activated, it’s combined with the flour, salt, and butter. The dough is kneaded until smooth and elastic, then allowed to rise in a warm place until it has doubled in size. This first rise typically takes about 1-2 hours.
2. The Butter Block: The Heart of the Layers
The next crucial step in the making of croissants is preparing the butter block, which is essential for creating the layered structure. Croissants owe their flaky, buttery texture to the process of lamination, which involves folding layers of dough and butter together multiple times.
To make the butter block, cold butter is used, typically around 85% butterfat content. The butter is softened slightly, then shaped into a square or rectangular block. It’s essential that the butter remains cold but pliable, as warm butter can melt into the dough, making the layers less distinct and less flaky.
3. Lamination: Folding and Rolling
The lamination process is what gives croissants their characteristic flaky texture. After the dough has risen, it is rolled out into a large rectangular sheet. The butter block is placed in the center of the dough, and the dough is folded over the butter to completely encase it. At this stage, the dough and butter are ready to undergo a series of folds and rolls.
- First fold: The dough is rolled into a long rectangle, and then the ends are folded over to create a letter-like fold. This process is called a single fold.
- Chilling: After each fold, the dough is refrigerated for about 30 minutes to 1 hour to keep the butter cold and firm. This step prevents the butter from melting into the dough and ensures that distinct layers are formed.
- Second fold: The dough is rolled out again, folded, and chilled. This process is repeated multiple times—typically three to four sets of folds—until the dough has about 27 layers of dough and butter. The number of layers is crucial for achieving the characteristic flakiness of croissants.
The folding and rolling process of lamination takes time and precision, as the goal is to achieve an even distribution of butter within the dough. This butter-to-dough layering is what will allow the dough to expand and puff up when baked, creating the light and crispy texture.
4. Shaping the Croissants
After the dough has undergone the necessary folds and chilling, it is ready to be shaped into croissants. The dough is rolled out one final time into a long rectangle, and then cut into triangular shapes. These triangles are then rolled up tightly from the wide edge to the pointy tip, creating the signature crescent shape of the croissant.
At this point, the croissants can also be filled with additional ingredients, such as chocolate, almond paste, or ham and cheese, to create different variations of this classic pastry. The edges of the dough are pinched together to ensure the croissants hold their shape during baking.
5. Proofing: Allowing the Croissants to Rise
Once shaped, the croissants need to undergo a second rise known as proofing. During proofing, the yeast continues to ferment, and the dough expands, puffing up to create a light, airy interior. The croissants are typically left to rise for 1-2 hours at room temperature.
It’s essential to let the croissants rise properly during this stage, as this allows them to achieve the ideal texture—soft and airy on the inside with a crisp exterior. Proofing at the right temperature ensures that the yeast remains active, and the dough achieves a perfect balance between softness and flakiness.
6. Baking: The Final Touch
The final step in the croissant-making process is baking. The oven should be preheated to a high temperature, typically around 375-400°F (190-200°C). The croissants are placed on a baking sheet lined with parchment paper and baked for about 15-20 minutes or until they are golden brown, crisp, and puffed up.
As the croissants bake, the layers of dough expand, creating the iconic flaky texture. The butter melts during the baking process, causing the layers to separate and form a delicate, light crumb structure. The final result is a beautifully golden and shiny croissant with a crisp, buttery crust and a soft, airy interior.
7. The Importance of Butter and Technique
The key to creating the perfect croissant lies in the combination of high-quality butter and precise technique. The butter should be cold, but not too hard, and the dough should be handled with care to avoid overworking it or causing the butter to melt. The lamination process, though time-consuming, is essential to achieving the signature layers that make croissants so special.
Using top-tier ingredients, such as European-style butter with a higher butterfat content, will elevate the croissant’s flavor and texture, resulting in a richer and more indulgent pastry.
Conclusion
Making croissants is a true art form—one that requires skill, patience, and precision. From the preparation of the dough to the delicate folding and rolling of the butter layers, each step contributes to the signature flakiness, buttery richness, and delicate texture that make croissants so irresistible. While the process may seem complex and time-consuming, the result is a pastry that is worth every bit of effort. Whether enjoyed plain, with a dollop of jam, or filled with your favorite ingredients, the buttery layers of a croissant make it a universally loved pastry.
-
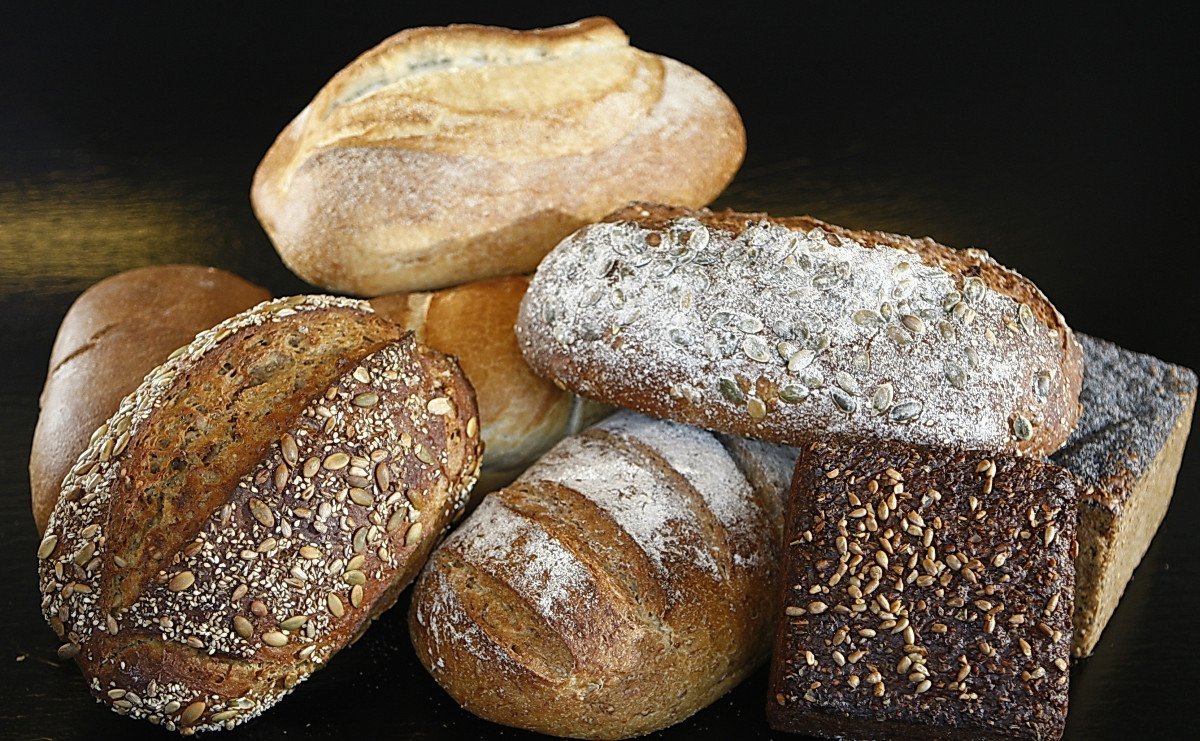
Sourdough vs. Regular Bread: What’s the Difference?
Bread is one of the oldest and most widely consumed foods across the world, with various types available to suit different tastes and preferences. Among the many bread varieties, two of the most popular are sourdough and regular bread (often referred to as yeast bread). While both types share some common ingredients like flour, water, and salt, they differ significantly in terms of their preparation, flavor, texture, and health benefits. Let’s dive into the key differences between sourdough and regular bread, exploring their unique characteristics, methods of preparation, and the reasons why sourdough has earned its place as a beloved artisanal bread.
1. Leavening Agent
The most significant difference between sourdough and regular bread lies in their leavening agents—the substances that cause the dough to rise.
- Sourdough Bread: Sourdough is leavened using wild yeast and lactic acid bacteria, both of which occur naturally in the environment. These microorganisms are cultivated in a mixture of flour and water known as a starter. The wild yeast ferments the sugars in the dough, while the bacteria produce lactic acid, contributing to the bread’s signature tangy flavor. This fermentation process can take several hours or even days, depending on the specific recipe and desired results.
- Regular Bread (Yeast Bread): In contrast, regular bread is typically leavened using commercial yeast, a highly concentrated form of yeast that has been cultivated for quick fermentation. Commercial yeast allows for a faster rise compared to wild yeast, usually taking only a couple of hours for the dough to double in size. Unlike sourdough, regular bread doesn’t rely on bacteria for flavor development and is often a more neutral-tasting loaf.
2. Flavor Profile
The flavor of the bread is greatly influenced by the type of leavening agent used, and this is one of the most noticeable differences between sourdough and regular bread.
- Sourdough Bread: The wild yeast and bacteria involved in sourdough fermentation create a complex, tangy flavor profile that sets it apart from regular bread. The lactic acid bacteria produce organic acids, primarily lactic acid and acetic acid, which give sourdough its distinctive sour taste. The longer the fermentation process, the more pronounced the tanginess. This makes sourdough bread a favorite for those who enjoy a bold, slightly tangy flavor with a depth of character.
- Regular Bread (Yeast Bread): Regular bread, made with commercial yeast, has a more neutral and slightly sweet flavor. The quick fermentation process doesn’t allow for the same level of flavor development, resulting in a milder taste. The focus of regular bread is on the texture and lightness, with the flavor often enhanced by added ingredients like sugar, butter, or oil. While it may not have the tanginess of sourdough, regular bread offers a soft, comforting taste that many people find appealing.
3. Texture and Crust
The texture and crust of bread are influenced by the fermentation process, as well as the ingredients used.
- Sourdough Bread: Sourdough typically has a chewy texture with a dense crumb, resulting from the longer fermentation period. The dough is usually more hydrated, leading to a slightly more open structure with larger air pockets. The crust of sourdough bread is typically thicker and crispy, often with a deep golden-brown color, thanks to the extended fermentation and the acids created during the process. The bread’s crust contributes significantly to its overall flavor, adding a bit of bitterness that complements the tanginess of the crumb.
- Regular Bread (Yeast Bread): Regular bread, especially varieties like white bread or sandwich bread, tends to have a softer texture with a finer crumb and smaller air pockets. This is due to the faster fermentation process and the use of commercial yeast. The crust of regular bread is usually softer as well, and it doesn’t develop the same depth of flavor as sourdough’s crust. While regular bread can still have a pleasant, slightly sweet aroma, it lacks the robust character that sourdough offers.
4. Preparation Time and Method
The preparation method and time required for sourdough and regular bread are also significant differences.
- Sourdough Bread: Making sourdough bread is a time-consuming process. The dough requires a starter, which is a mixture of flour and water that has been fermented with wild yeast and bacteria. Creating and maintaining the starter takes several days, as it needs to be fed regularly with fresh flour and water to ensure the microorganisms stay active. After the starter is ready, the dough must undergo a lengthy fermentation period—sometimes up to 24 hours or more—allowing the wild yeast and bacteria to work their magic. The slow fermentation process contributes to the unique flavor and texture of sourdough but requires patience and attention to detail.
- Regular Bread (Yeast Bread): Regular bread is much quicker to prepare, as it relies on commercial yeast to speed up the fermentation process. The dough is mixed, kneaded, and left to rise for a few hours, typically doubling in size within 1-2 hours. After that, it is shaped, proofed, and baked. The overall preparation time is much shorter compared to sourdough, making regular bread a convenient option for home bakers looking for a faster result.
5. Nutritional Profile and Health Benefits
Sourdough and regular bread both have nutritional benefits, but sourdough’s unique fermentation process may offer some advantages.
- Sourdough Bread: The lactic acid bacteria in sourdough not only contribute to its flavor but also enhance the bread’s digestibility and nutrient absorption. The fermentation process helps break down gluten and phytic acid, making it easier for the body to digest and absorb nutrients like iron and zinc. Additionally, sourdough has a lower glycemic index compared to regular bread, meaning it has a slower, more gradual effect on blood sugar levels. Some people with mild gluten sensitivities find sourdough easier to tolerate than regular bread due to the breakdown of gluten during fermentation.
- Regular Bread (Yeast Bread): Regular bread, particularly white bread, is often made with refined flour and may have a higher glycemic index, leading to quicker spikes in blood sugar. While it provides essential carbohydrates and some vitamins and minerals, it doesn’t offer the same level of nutritional benefits as sourdough. Whole grain varieties of regular bread may provide additional fiber and nutrients, but they still lack the complex benefits that sourdough’s natural fermentation process provides.
6. Shelf Life
The shelf life of sourdough and regular bread can vary, with sourdough generally lasting longer.
- Sourdough Bread: Thanks to its lower pH and natural preservatives created during fermentation, sourdough typically has a longer shelf life compared to regular bread. The acidity in sourdough helps inhibit the growth of mold, allowing it to stay fresh for several days without spoiling. In fact, many people find that sourdough actually improves in flavor after a day or two, as the tanginess deepens.
- Regular Bread (Yeast Bread): Regular bread, especially commercially-produced varieties, often has a shorter shelf life and can become stale or moldy more quickly. This is especially true for bread made with preservatives or those made with white flour, as the lack of acidity and preservatives can encourage mold growth and spoilage. However, storing bread in a cool, dry place or freezing it can help extend its shelf life.
Conclusion
Sourdough and regular bread may seem similar at first glance, but they are quite different in terms of their ingredients, preparation methods, flavor profiles, textures, and health benefits. Sourdough, with its wild yeast and bacterial fermentation, offers a tangy flavor, chewy texture, and potential health benefits like better digestibility and a lower glycemic index. On the other hand, regular bread, made with commercial yeast, is quicker to prepare, has a milder flavor, and is more convenient for those who prefer a soft, neutral-tasting loaf. Whether you’re drawn to the deep, complex flavors of sourdough or the light, airy texture of regular bread, both types of bread have a special place in the world of baking.
-
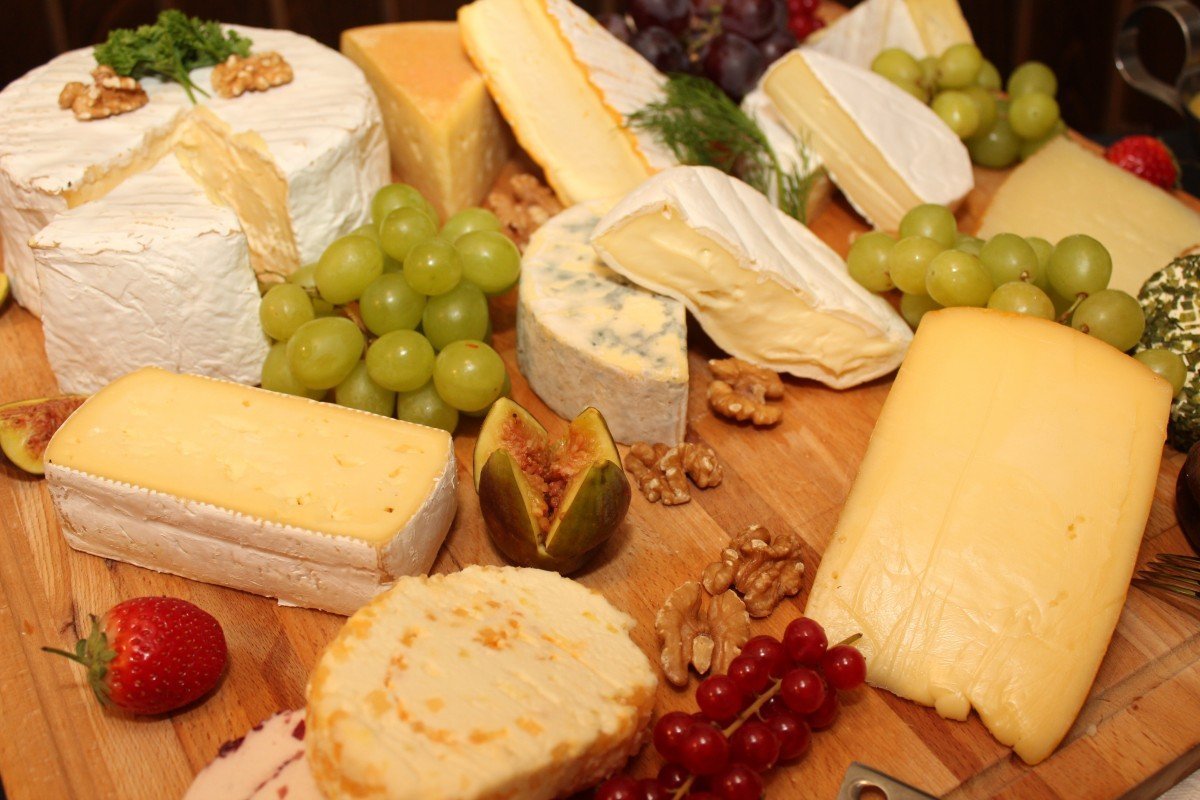
How Artisanal Cheese Is Made: A Look Inside Dairy Farms
Artisanal cheese is more than just a gourmet delicacy—it’s a testament to traditional craftsmanship, high-quality ingredients, and time-honored techniques. Unlike mass-produced cheese, artisanal varieties are handcrafted in small batches, often using milk sourced directly from local dairy farms. But what goes into making these rich, flavorful cheeses? Let’s take a journey inside a dairy farm to uncover the art behind artisanal cheese production.
1. Sourcing the Best Milk
The foundation of any great cheese starts with high-quality milk. Dairy farms producing artisanal cheese often prioritize:
- Freshness – Milk is typically used within hours of milking to preserve its natural flavors.
- Animal welfare – Farms focus on ethical treatment, allowing cows, goats, or sheep to graze on natural pastures, which enhances the milk’s taste and nutritional value.
- Minimal processing – Many artisanal cheesemakers use raw, unpasteurized milk to retain the complex flavors and beneficial bacteria that contribute to cheese aging.
2. The Art of Curdling
Once the milk is collected, it undergoes a curdling process:
- Heating the Milk – The milk is gently warmed to a specific temperature, depending on the type of cheese being made.
- Adding Cultures & Rennet – Starter cultures (beneficial bacteria) are introduced to develop flavor and texture. Rennet, a natural enzyme, is added to solidify the milk into curds.
- Curd Formation – Over time, the milk thickens and separates into curds (solids) and whey (liquid). The curds are then cut into small pieces to release moisture and shape the final cheese texture.
3. Draining & Pressing the Curds
Once cut, the curds are gently stirred and drained to remove excess whey. Some cheeses, like soft goat cheese, are left to drain naturally, while firmer cheeses (like cheddar or gouda) are pressed to expel more moisture. The amount of whey removed influences the cheese’s texture—drier curds lead to harder cheeses, while more moisture results in soft, creamy varieties.
4. Salting & Flavor Development
Salt is essential in cheese-making, not just for taste but also for preservation. Cheesemakers apply salt in various ways:
- Direct Mixing – Salt is blended into the curds before shaping.
- Brining – Some cheeses are soaked in a saltwater solution to develop a protective rind and enhance flavor.
- Surface Salting – Hard cheeses are sometimes rubbed with salt, herbs, or even wine for a unique outer crust.
5. Aging & Maturation
Aging, or affinage, is where the magic happens. Cheese wheels are carefully stored in temperature- and humidity-controlled environments, sometimes in natural caves or specialized cellars. This stage can last anywhere from a few weeks to several years.
- Soft cheeses (like brie) mature quickly, developing a creamy texture.
- Semi-hard cheeses (like gouda) age for months, balancing firmness with a rich flavor.
- Hard cheeses (like parmesan) require years to develop deep, nutty profiles.
Cheesemakers monitor the aging process, flipping and brushing the cheese to ensure even ripening and prevent spoilage. Some cheeses even develop edible molds, such as the blue veins in Roquefort or Stilton.
6. Handcrafted Finishing Touches
Artisanal cheesemakers often add unique finishing touches before their cheese reaches the market:
- Wrapping in leaves or wax for protection.
- Smoking for added depth and aroma.
- Infusing with herbs, spices, or truffle for gourmet flavors.
Each step is done by hand, ensuring that every batch maintains its artisanal integrity.
Conclusion
The journey from farm to table is a labor of love, requiring patience, skill, and deep respect for tradition. Artisanal cheese-making is not just about producing food—it’s about crafting an experience, one that highlights the rich flavors and heritage of dairy farms. Whether it’s a creamy brie, a sharp cheddar, or a pungent blue, every bite of artisanal cheese tells a story of craftsmanship, quality, and passion.
-

The Secret Behind Perfectly Crispy Popcorn
Popcorn is one of the most beloved snacks worldwide, enjoyed at movie nights, fairs, and casual gatherings. While making popcorn seems simple, achieving the perfect crispy texture requires a combination of science, technique, and the right ingredients. So, what’s the secret behind that light, airy crunch that keeps us reaching for more? Let’s explore the factors that make popcorn irresistibly crispy.
1. The Science Behind Popping
Popcorn kernels contain moisture inside their hard outer shell. When heated, the water inside turns into steam, building pressure until the shell bursts open. The starch inside then expands and cools into the fluffy shape we recognize as popcorn.
The key to achieving crispy popcorn is ensuring the right amount of moisture inside the kernels. Too much moisture results in chewy popcorn, while too little can lead to unpopped or dry pieces. The ideal moisture content for popcorn kernels is around 14%.
2. Choosing the Right Popcorn Kernels
Not all popcorn is created equal. There are two main types of popcorn kernels:
- Butterfly popcorn – Light and fluffy with irregular shapes, commonly used in movie theaters.
- Mushroom popcorn – Rounder and denser, often used for caramel or flavored popcorn.
For the crispiest texture, butterfly popcorn is the preferred choice, as its thin, delicate structure enhances crunchiness.
3. The Importance of Heat and Oil
The right temperature is crucial for even popping. The optimal range is 350°F to 400°F (175°C to 200°C). If the heat is too low, the kernels won’t pop fully, leaving them dense or chewy. Too high, and they can burn before fully expanding.
Using the right oil also helps achieve the perfect crisp. Oils with high smoke points, such as coconut oil, canola oil, or avocado oil, allow even heating without burning. Coconut oil, in particular, is favored in movie theaters for its ability to create a crispy texture while adding a rich flavor.
4. Avoiding Steam for Maximum Crispiness
One common mistake when making popcorn is trapping steam inside the pot or popcorn machine. Excess steam leads to soggy popcorn. To prevent this:
- Use a vented lid if popping on the stovetop.
- Shake the pot occasionally to release trapped steam.
- Transfer freshly popped popcorn to a large bowl immediately, allowing air circulation.
5. Perfect Seasoning Without Sogginess
Adding butter or seasoning too soon can make popcorn lose its crispiness. The best way to flavor popcorn while keeping it crispy is to:
- Use clarified butter (ghee) instead of regular butter, as it contains less moisture.
- Apply seasonings while the popcorn is still warm to help flavors stick without softening the texture.
- Use finely powdered seasonings like nutritional yeast, powdered cheese, or salt for even coating without excess moisture.
6. Storing Popcorn for Lasting Crispiness
If you want to keep popcorn crispy for longer, proper storage is key. Some tips include:
- Use an airtight container to prevent moisture absorption.
- Avoid storing in the refrigerator, as humidity can soften popcorn.
- Reheat in a dry oven (250°F for a few minutes) to restore crispiness if it turns stale.
Conclusion
The secret behind perfectly crispy popcorn lies in the science of moisture balance, the right popping temperature, proper oil selection, and preventing steam buildup. By following these techniques, you can achieve light, crunchy popcorn every time. Whether you enjoy it with classic butter and salt or experiment with creative flavors, mastering these steps will elevate your popcorn game to movie-theater quality.
-
Why Potato Chips Are the World’s Favorite Snack
Potato chips have earned their place as one of the world’s most beloved snacks, enjoyed by millions across different cultures and continents. Their irresistible combination of crunch, flavor, and convenience makes them a go-to choice for casual snacking, social gatherings, and even gourmet indulgences. But what exactly makes potato chips so universally popular? From their rich history to their addictive taste, let’s explore why they continue to dominate the snack industry.
1. A Snack with History
The origin of potato chips dates back to 1853 when George Crum, a chef in New York, accidentally created them while trying to satisfy a customer who complained about thick, soggy fries. He sliced the potatoes extra thin, fried them until crispy, and seasoned them with salt. To his surprise, the dish became an instant hit, laying the foundation for the potato chip industry.
Since then, potato chips have evolved from a local specialty to a global phenomenon, with countless variations in flavors, textures, and styles.
2. The Perfect Crunch
One of the biggest reasons for their popularity is the satisfying crunch. The process of frying thinly sliced potatoes removes moisture while creating a crispy, golden texture. This sensory experience is a key factor in why people crave chips—scientifically, the sound of crunching enhances the perception of freshness and enjoyment.
Food scientists have even studied the ideal crispiness level, leading to innovations like kettle-cooked chips, which offer a thicker, crunchier bite compared to regular chips.
3. Endless Flavor Variety
Potato chips cater to every palate, with flavors ranging from classic salted to exotic combinations like wasabi, truffle, or barbecue. Some of the most popular flavors worldwide include:
- Classic salted – Simple yet timeless.
- Barbecue – A smoky, sweet, and savory blend.
- Sour cream & onion – A creamy and tangy mix.
- Cheese-based flavors – Such as cheddar or nacho cheese.
- Spicy varieties – Like jalapeño or chili-lime.
Different countries also have their own unique flavors. In Japan, you’ll find wasabi or seaweed-flavored chips, while the UK enjoys prawn cocktail and salt & vinegar varieties. This diversity ensures that everyone can find a flavor they love.
4. Convenience and Accessibility
Potato chips are widely available, affordable, and easy to store, making them one of the most accessible snack options. Whether sold in small grab-and-go packs or large family-sized bags, they fit every occasion. Unlike some snacks that require preparation, chips are ready to eat straight from the bag, making them a hassle-free choice for people of all ages.
5. The Addictive Science Behind Chips
Potato chips are engineered to be addictive, thanks to a combination of fat, salt, and carbohydrates. The brain craves this combination because it triggers dopamine release, the “feel-good” chemical.
The phenomenon known as “sensory-specific satiety” also plays a role. Chips are flavorful but not overwhelming, making it easy to eat more without getting bored. This is why “once you pop, you can’t stop” isn’t just a catchy slogan—it’s based on real food science.
6. A Social and Cultural Staple
Chips have become a staple at parties, movie nights, picnics, and sporting events. Their shareable nature makes them a go-to snack for social settings, while their versatility allows them to be paired with dips like salsa, guacamole, or cheese sauce.
Beyond casual snacking, potato chips have even entered high-end cuisine, with chefs incorporating them into gourmet dishes or using them as crispy toppings for salads and burgers.
7. Innovations and Healthier Options
With the growing demand for healthier snacks, the potato chip industry has evolved to offer alternatives such as:
- Baked chips – Lower in fat than traditional fried chips.
- Kettle-cooked chips – Thicker and crunchier, often perceived as more natural.
- Vegetable-based chips – Mixed with ingredients like sweet potatoes or beets.
- Reduced-sodium or no-oil chips – For those looking for a healthier option.
These innovations help maintain their popularity while catering to more health-conscious consumers.
Conclusion
Potato chips have stood the test of time as the world’s favorite snack. Their satisfying crunch, endless variety of flavors, and convenience make them a universal treat. Whether enjoyed on their own, paired with dips, or incorporated into creative dishes, potato chips continue to reign supreme in the snack world. Their perfect blend of taste, texture, and availability ensures they remain a go-to indulgence for people of all ages.