
Category: Bakery

  • The Making of Croissants: A Buttery Layered Delight

    The Making of Croissants: A Buttery Layered Delight

    Croissants are a beloved pastry that has won hearts worldwide with their irresistible combination of buttery layers and delicate, flaky texture. Whether enjoyed for breakfast, as a snack, or as a component of a more elaborate meal, croissants are a symbol of indulgence and craftsmanship. However, behind this simple yet luxurious pastry lies a meticulous process of layering dough and butter to create the signature crispiness and flakiness that make croissants so special. In this article, we’ll explore the step-by-step process of making croissants, from mixing the dough to the final golden, buttery result.

    1. The Basics: The Dough

    The process of making croissants begins with creating the dough, which is a form of yeast-leavened dough. This dough is similar to a pâte brisée or pâte feuilletée (puff pastry), but it contains yeast, giving it a slightly airy and elastic quality.

    The key ingredients in the dough include:

    • Flour: High-protein bread flour is typically used for croissant dough, as it creates a strong gluten structure, which helps trap the layers of butter as the dough bakes.
    • Yeast: Active dry yeast or instant yeast is added to the dough to enable the fermentation process, which helps the dough rise and become light.
    • Milk: Adds moisture and richness to the dough, contributing to the soft texture of the finished croissant.
    • Sugar: A small amount of sugar is added, not just for sweetness but to help activate the yeast and contribute to the browning of the croissants as they bake.
    • Salt: Enhances the flavor and balances the sweetness of the dough.

    To begin, the yeast is activated by mixing it with warm milk and sugar, which helps it dissolve and start fermenting. Once the yeast is activated, it’s combined with the flour, salt, and butter. The dough is kneaded until smooth and elastic, then allowed to rise in a warm place until it has doubled in size. This first rise typically takes about 1-2 hours.

    2. The Butter Block: The Heart of the Layers

    The next crucial step in the making of croissants is preparing the butter block, which is essential for creating the layered structure. Croissants owe their flaky, buttery texture to the process of lamination, which involves folding layers of dough and butter together multiple times.

    To make the butter block, cold butter is used, typically around 85% butterfat content. The butter is softened slightly, then shaped into a square or rectangular block. It’s essential that the butter remains cold but pliable, as warm butter can melt into the dough, making the layers less distinct and less flaky.

    3. Lamination: Folding and Rolling

    The lamination process is what gives croissants their characteristic flaky texture. After the dough has risen, it is rolled out into a large rectangular sheet. The butter block is placed in the center of the dough, and the dough is folded over the butter to completely encase it. At this stage, the dough and butter are ready to undergo a series of folds and rolls.

    • First fold: The dough is rolled into a long rectangle, and then the ends are folded over to create a letter-like fold. This process is called a single fold.
    • Chilling: After each fold, the dough is refrigerated for about 30 minutes to 1 hour to keep the butter cold and firm. This step prevents the butter from melting into the dough and ensures that distinct layers are formed.
    • Second fold: The dough is rolled out again, folded, and chilled. This process is repeated multiple times—typically three to four sets of folds—until the dough has about 27 layers of dough and butter. The number of layers is crucial for achieving the characteristic flakiness of croissants.

    The folding and rolling process of lamination takes time and precision, as the goal is to achieve an even distribution of butter within the dough. This butter-to-dough layering is what will allow the dough to expand and puff up when baked, creating the light and crispy texture.

    4. Shaping the Croissants

    After the dough has undergone the necessary folds and chilling, it is ready to be shaped into croissants. The dough is rolled out one final time into a long rectangle, and then cut into triangular shapes. These triangles are then rolled up tightly from the wide edge to the pointy tip, creating the signature crescent shape of the croissant.

    At this point, the croissants can also be filled with additional ingredients, such as chocolate, almond paste, or ham and cheese, to create different variations of this classic pastry. The edges of the dough are pinched together to ensure the croissants hold their shape during baking.

    5. Proofing: Allowing the Croissants to Rise

    Once shaped, the croissants need to undergo a second rise known as proofing. During proofing, the yeast continues to ferment, and the dough expands, puffing up to create a light, airy interior. The croissants are typically left to rise for 1-2 hours at room temperature.

    It’s essential to let the croissants rise properly during this stage, as this allows them to achieve the ideal texture—soft and airy on the inside with a crisp exterior. Proofing at the right temperature ensures that the yeast remains active, and the dough achieves a perfect balance between softness and flakiness.

    6. Baking: The Final Touch

    The final step in the croissant-making process is baking. The oven should be preheated to a high temperature, typically around 375-400°F (190-200°C). The croissants are placed on a baking sheet lined with parchment paper and baked for about 15-20 minutes or until they are golden brown, crisp, and puffed up.

    As the croissants bake, the layers of dough expand, creating the iconic flaky texture. The butter melts during the baking process, causing the layers to separate and form a delicate, light crumb structure. The final result is a beautifully golden and shiny croissant with a crisp, buttery crust and a soft, airy interior.

    7. The Importance of Butter and Technique

    The key to creating the perfect croissant lies in the combination of high-quality butter and precise technique. The butter should be cold, but not too hard, and the dough should be handled with care to avoid overworking it or causing the butter to melt. The lamination process, though time-consuming, is essential to achieving the signature layers that make croissants so special.

    Using top-tier ingredients, such as European-style butter with a higher butterfat content, will elevate the croissant’s flavor and texture, resulting in a richer and more indulgent pastry.

    Conclusion

    Making croissants is a true art form—one that requires skill, patience, and precision. From the preparation of the dough to the delicate folding and rolling of the butter layers, each step contributes to the signature flakiness, buttery richness, and delicate texture that make croissants so irresistible. While the process may seem complex and time-consuming, the result is a pastry that is worth every bit of effort. Whether enjoyed plain, with a dollop of jam, or filled with your favorite ingredients, the buttery layers of a croissant make it a universally loved pastry.
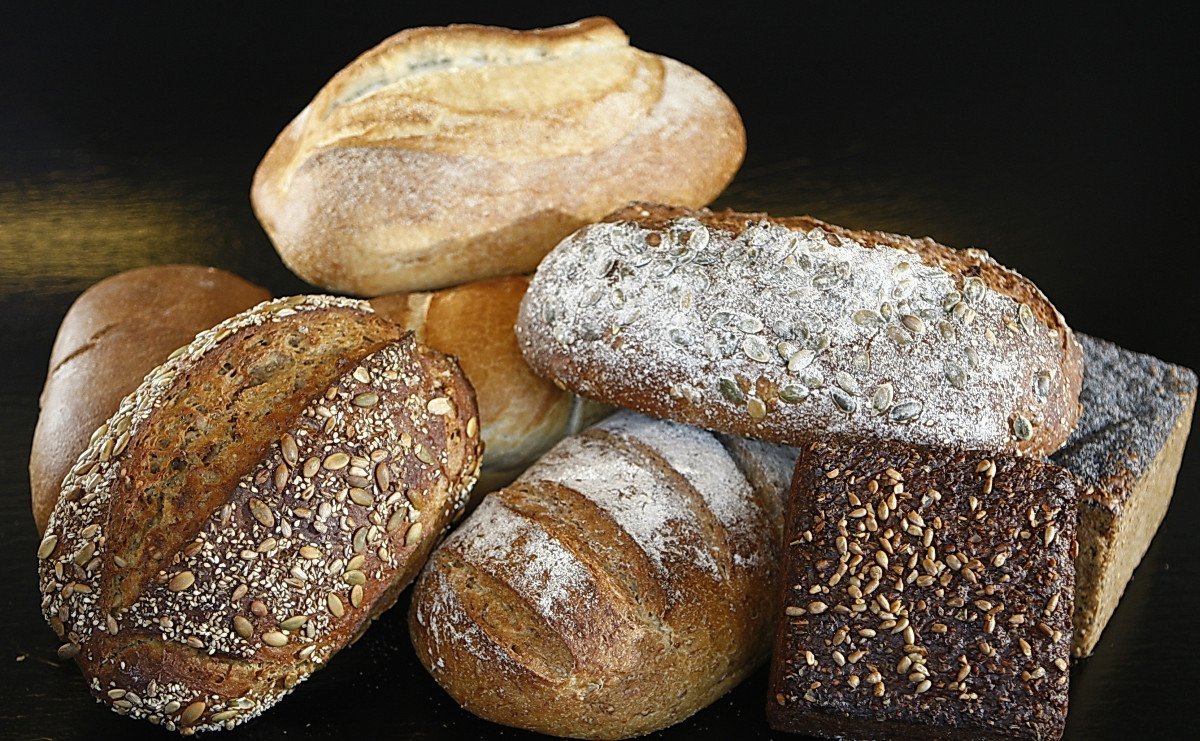
  • Sourdough vs. Regular Bread: What’s the Difference?

    Sourdough vs. Regular Bread: What’s the Difference?

    Bread is one of the oldest and most widely consumed foods across the world, with various types available to suit different tastes and preferences. Among the many bread varieties, two of the most popular are sourdough and regular bread (often referred to as yeast bread). While both types share some common ingredients like flour, water, and salt, they differ significantly in terms of their preparation, flavor, texture, and health benefits. Let’s dive into the key differences between sourdough and regular bread, exploring their unique characteristics, methods of preparation, and the reasons why sourdough has earned its place as a beloved artisanal bread.

    1. Leavening Agent

    The most significant difference between sourdough and regular bread lies in their leavening agents—the substances that cause the dough to rise.

    • Sourdough Bread: Sourdough is leavened using wild yeast and lactic acid bacteria, both of which occur naturally in the environment. These microorganisms are cultivated in a mixture of flour and water known as a starter. The wild yeast ferments the sugars in the dough, while the bacteria produce lactic acid, contributing to the bread’s signature tangy flavor. This fermentation process can take several hours or even days, depending on the specific recipe and desired results.
    • Regular Bread (Yeast Bread): In contrast, regular bread is typically leavened using commercial yeast, a highly concentrated form of yeast that has been cultivated for quick fermentation. Commercial yeast allows for a faster rise compared to wild yeast, usually taking only a couple of hours for the dough to double in size. Unlike sourdough, regular bread doesn’t rely on bacteria for flavor development and is often a more neutral-tasting loaf.

    2. Flavor Profile

    The flavor of the bread is greatly influenced by the type of leavening agent used, and this is one of the most noticeable differences between sourdough and regular bread.

    • Sourdough Bread: The wild yeast and bacteria involved in sourdough fermentation create a complex, tangy flavor profile that sets it apart from regular bread. The lactic acid bacteria produce organic acids, primarily lactic acid and acetic acid, which give sourdough its distinctive sour taste. The longer the fermentation process, the more pronounced the tanginess. This makes sourdough bread a favorite for those who enjoy a bold, slightly tangy flavor with a depth of character.
    • Regular Bread (Yeast Bread): Regular bread, made with commercial yeast, has a more neutral and slightly sweet flavor. The quick fermentation process doesn’t allow for the same level of flavor development, resulting in a milder taste. The focus of regular bread is on the texture and lightness, with the flavor often enhanced by added ingredients like sugar, butter, or oil. While it may not have the tanginess of sourdough, regular bread offers a soft, comforting taste that many people find appealing.

    3. Texture and Crust

    The texture and crust of bread are influenced by the fermentation process, as well as the ingredients used.

    • Sourdough Bread: Sourdough typically has a chewy texture with a dense crumb, resulting from the longer fermentation period. The dough is usually more hydrated, leading to a slightly more open structure with larger air pockets. The crust of sourdough bread is typically thicker and crispy, often with a deep golden-brown color, thanks to the extended fermentation and the acids created during the process. The bread’s crust contributes significantly to its overall flavor, adding a bit of bitterness that complements the tanginess of the crumb.
    • Regular Bread (Yeast Bread): Regular bread, especially varieties like white bread or sandwich bread, tends to have a softer texture with a finer crumb and smaller air pockets. This is due to the faster fermentation process and the use of commercial yeast. The crust of regular bread is usually softer as well, and it doesn’t develop the same depth of flavor as sourdough’s crust. While regular bread can still have a pleasant, slightly sweet aroma, it lacks the robust character that sourdough offers.

    4. Preparation Time and Method

    The preparation method and time required for sourdough and regular bread are also significant differences.

    • Sourdough Bread: Making sourdough bread is a time-consuming process. The dough requires a starter, which is a mixture of flour and water that has been fermented with wild yeast and bacteria. Creating and maintaining the starter takes several days, as it needs to be fed regularly with fresh flour and water to ensure the microorganisms stay active. After the starter is ready, the dough must undergo a lengthy fermentation period—sometimes up to 24 hours or more—allowing the wild yeast and bacteria to work their magic. The slow fermentation process contributes to the unique flavor and texture of sourdough but requires patience and attention to detail.
    • Regular Bread (Yeast Bread): Regular bread is much quicker to prepare, as it relies on commercial yeast to speed up the fermentation process. The dough is mixed, kneaded, and left to rise for a few hours, typically doubling in size within 1-2 hours. After that, it is shaped, proofed, and baked. The overall preparation time is much shorter compared to sourdough, making regular bread a convenient option for home bakers looking for a faster result.

    5. Nutritional Profile and Health Benefits

    Sourdough and regular bread both have nutritional benefits, but sourdough’s unique fermentation process may offer some advantages.

    • Sourdough Bread: The lactic acid bacteria in sourdough not only contribute to its flavor but also enhance the bread’s digestibility and nutrient absorption. The fermentation process helps break down gluten and phytic acid, making it easier for the body to digest and absorb nutrients like iron and zinc. Additionally, sourdough has a lower glycemic index compared to regular bread, meaning it has a slower, more gradual effect on blood sugar levels. Some people with mild gluten sensitivities find sourdough easier to tolerate than regular bread due to the breakdown of gluten during fermentation.
    • Regular Bread (Yeast Bread): Regular bread, particularly white bread, is often made with refined flour and may have a higher glycemic index, leading to quicker spikes in blood sugar. While it provides essential carbohydrates and some vitamins and minerals, it doesn’t offer the same level of nutritional benefits as sourdough. Whole grain varieties of regular bread may provide additional fiber and nutrients, but they still lack the complex benefits that sourdough’s natural fermentation process provides.

    6. Shelf Life

    The shelf life of sourdough and regular bread can vary, with sourdough generally lasting longer.

    • Sourdough Bread: Thanks to its lower pH and natural preservatives created during fermentation, sourdough typically has a longer shelf life compared to regular bread. The acidity in sourdough helps inhibit the growth of mold, allowing it to stay fresh for several days without spoiling. In fact, many people find that sourdough actually improves in flavor after a day or two, as the tanginess deepens.
    • Regular Bread (Yeast Bread): Regular bread, especially commercially-produced varieties, often has a shorter shelf life and can become stale or moldy more quickly. This is especially true for bread made with preservatives or those made with white flour, as the lack of acidity and preservatives can encourage mold growth and spoilage. However, storing bread in a cool, dry place or freezing it can help extend its shelf life.

    Conclusion

    Sourdough and regular bread may seem similar at first glance, but they are quite different in terms of their ingredients, preparation methods, flavor profiles, textures, and health benefits. Sourdough, with its wild yeast and bacterial fermentation, offers a tangy flavor, chewy texture, and potential health benefits like better digestibility and a lower glycemic index. On the other hand, regular bread, made with commercial yeast, is quicker to prepare, has a milder flavor, and is more convenient for those who prefer a soft, neutral-tasting loaf. Whether you’re drawn to the deep, complex flavors of sourdough or the light, airy texture of regular bread, both types of bread have a special place in the world of baking.